Homemade Deodorant Revamped

After a suggestion (Thanks Monique!) that I try coconut oil in my homemade deodorant recipe, I started mixing it up today.

INGREDIENTS:

2 1/2 tbsp of Spectrum Organic Coconut Oil (The Virgin Coconut oil is what smells like yummy coconuts. This one doesn’t smell.)

2 tbsp cornstarch

1/2 tbsp baking soda

5 drops vitamin E (for moisturizing purposes)

3 drops essential oil (for smell)

I heated my coconut oil in the microwave because the liquid is easier to mix than the solid. I combined the ingredients in a pyrex measurement cup and stirred it well until blended.

Use your finger to apply.

As the coconut oil dries, it becomes thick and solid. I added Aura Cacia essential oil to my deodorant because it is my favorite. Baby food jars/containers are the perfect container to reuse for this as well. I have to admit that I like this recipe MUCH better than my former petro jelly version! It’s cheaper than buying store bought deodorant as I can make about 7 containers with just 1 jar of coconut oil!

This would make a great homemade Christmas gift!

Please respect that this recipe is intended for personal use and not for sale.

DIY Toilet Bowl Cleaner

Vinegar is the obvious choice for a DIY natural toilet bowl cleaner, but I personally can’t stand heavy doses of straight vinegar. Not to mention, I prefer a little more suds in my “clean.” To make your own toilet bowl cleaner, feel free to follow my recipe below:

1/8 cup castile soap. I use Dr. Bronner’s.

1/2 cup vinegar

1 cup water

-optional-

Add 10 drops of tea tree oil for antibacterial purposes. I like this for spraying the toilet seats themselves.

You could also substitute castile soap with a bar of soap to cut down on cost or use what you have. If you’re using a bar of soap, you’ll want some type of grater dedicated to shaving soap. You’ll only need 1/4 of the soap bar for this as well.

This will yield enough to fill a small bottle. Add to a recycled spray bottle for really easy cleaning.

_____________________________

I apologize for the lack of pictures! My camera broke today and has been sent off for repair. I hope to be up and running soon!

Wipes Solution

Lately I’ve been using Honey Bun Drops by Chubby Cherubs, LLC because I had them on hand. Of the many different scents and ingredients that she carries, I like the Milk and Honey best. They do work well and smell really well. They cost $10 for a 5 oz. bag and with shipping will run $15.  

When I’m not so lucky to receive a product like this, I make my own wipes solution! My first DIY wipes solution consisted of:

1/2 cup of water

3-4 drops of tea tree oil

3 drops vitamin E

NOW ADDED:

4 drops of Dr. Bronner’s Castile Soap

I’ve found that over time I like to add some Dr. Bronner’s to this as well. There’s an extra added clean feeling to it if you add a little squirt of castile soap!

Homemade Natural Laundry Detergent

Today is the day I replenishing my laundry soap and working on some homemade stuff. Get your pencils ready for some recipes!

There is never a shortage of recycled bottles in this house because my husband (the non-environmentalist) is a soda-only drinker. Yes, we are two opposites. I personally love these little bottles from Gerber’s Organic Apple juice. They’re small and perfect for travel. They are easily stored and house 3 laundry loads each.

Combine:

1  cup water
2 oz. Dr. Bronner’s Castile Soap
1 cup baking soda
1/4 cup vinegar

Mix well and pour into desired recycled container.


The concoction looks like this:

Be sure to shake up your container before each use.

Not only is this inexpensive, but a little goes a long way. The more water you add to your recipe, the longer it will stretch. You can also use less castile soap if you’d like. We typically have a lot of staining so I use more.

Dr. Bronner’s also has different scents. I use lavender so we have a hint of lavender scent in the wash.

Enjoy!

A Batty Halloween

I posted yesterday on some eco-friendly ideas for costumes. I thought I’d share my costume today! I used two t-shirts to create this upcycled “Bat Dress.”

Bacardi Shirt

I cut the sleeves off of this men’s bacardi shirt. I chose it because I wanted an orange and green theme, but I thought I could play up the bats on it!

I took another XL men’s t-shirt in orange and cut the bottom to create a trim.

Orange t-shirt trim

I cut the seams on both sides of the t-shirt to open it up, pinned the orange trim to the bottom of both sides and used a zig zag stitch to sew them to the shirt.

I cut the sleeves off of my orange t-shirt, opened them up and sewed them to the sleeveless dress with an exposed zig zag stitch. I also cut the ends of the sleeves off to leave a raw edge.

The neckline was cut into a boat neck shape and left with a raw edge.

The finished product?

The neckline looks funny in the picture, but it’s a straight boat neck! I’m working on a pin to cover up that bacardi logo … some bat wings or maybe a full scale bat! 🙂

Lots o' Scraps

I’ll have a tutorial later on for what happens to all these left over scraps!

Upcycling clothing is simple. I didn’t use a pattern for this dress. To create my own pattern, I often trace existing pieces for the size. This is also free and doesn’t require you to keep up with a lot of tissue paper patterns. If you do want to use a pattern, it’s easy to transform a pattern into something else. I do have patterns that are cut from what they were originally intended to be into something different.

I’ll have more tutorials coming up on this subject.

I watched Live with Regis and Kelly this morning. They were featuring many of the crafts suggestions from Family Fun magazine which I am subscribed to. I love this easy repurposed decoration:

Adorable Milk Jug Centerpiece

You use a permanent marker to draw a face on a recycled milk jug then stick a flameless tealight inside. You have an adorable centerpiece, decoration for your porch or think of how CUTE these would be lining your walkway! If I can find the jugs, I want to set these out along my walkway!

Plastic Explosion

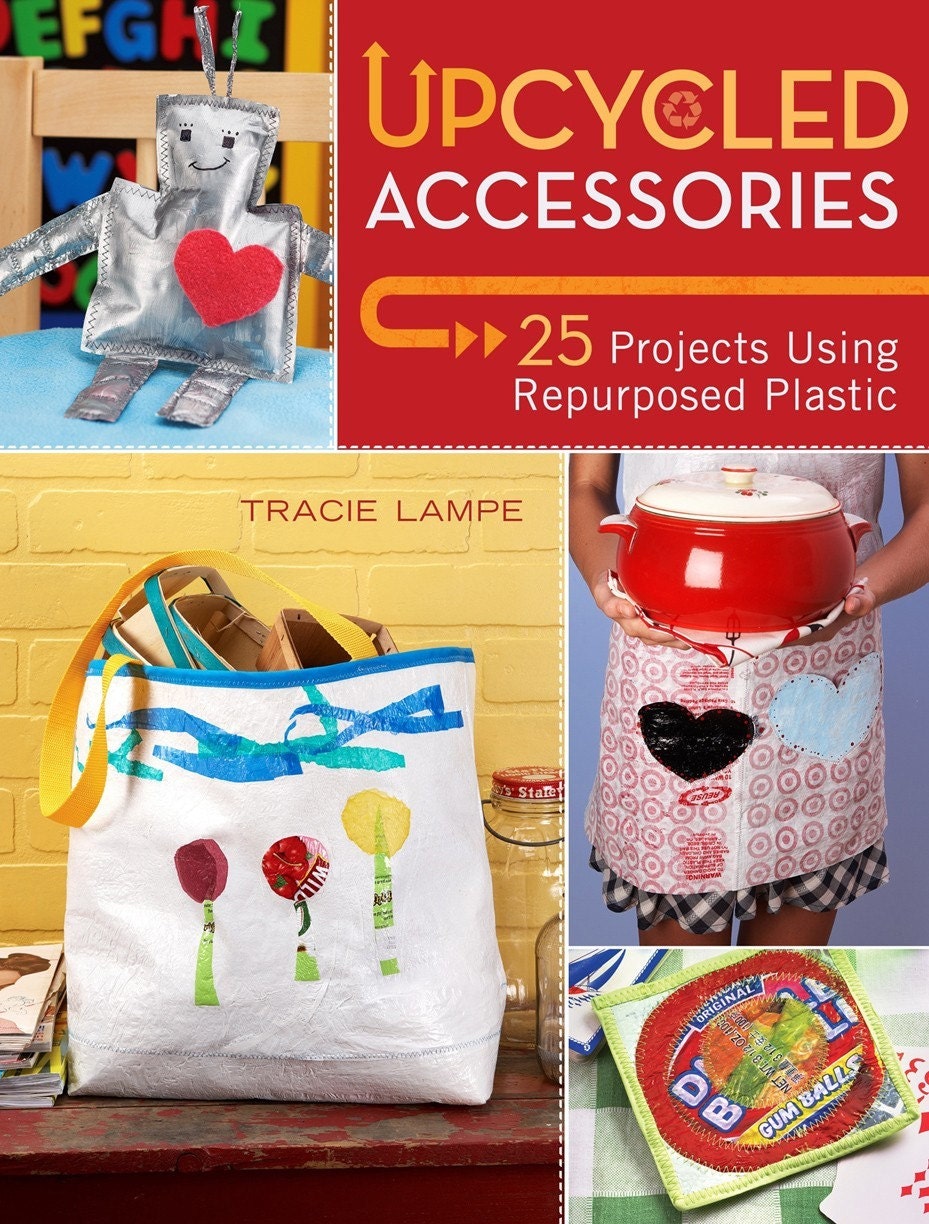
Every day we see thousands of advertisements in many different medias. You probably pass at least one or two billboard advertisements, banners, and all sorts of plastics. Do you ever wonder what happens to banners when they are taken down? What about all those plastic bags you “recycle” into bins at the grocery store? Sara has taken recycling and turned into useful works of art! When I saw Sara Bella  products I HAD to have one. The biggest problem was choosing which piece of recycled wear I would love most. Sara makes lots of different accessories for every type of person using recycled plastic.

Wallet!

The original Sara Bella* was founded in 1991. Our company’s philosophy was to utilize high-quality craftsmanship and top-grade materials to produce exuberant designs that appealed to both kids and adults. All of our products were made with Polartec © Polarfleece and all were made in the United States.

My other favorite product! Books and art supplies couldn't be toted in a more fun way!

About Sara Bella:

The name, Sara Bella started with me, Sara – I’m the owner and designer of all Sara Bella* products and I live in Bend, Oregon, with my partner and our daughter, Bella. The original Bella was my grandmother. She taught me how to sew when I was a little girl. I have always felt that she was the most amazing woman and lived a sustainable, honest lifestyle that we all strive to live. She made her own clothing and her food was made from only fresh ingredients with nothing more than her bare hands and love for her family. There was nothing artificial about Bella – in her spirit or her practice on this planet.

After 14 years in the retail business of Sara Bella*, it was time to take a break and do development work in Africa and to renew my teaching license. In 2010 my new retail business, Sara Bella* Upcycled was formed, this time with a greater mission; to teach the methods used to create environmentally friendly goods in the United States as well as abroad.

Today, all of our work is done in honor of the earth. We use only trash – plastic bags and banners that would otherwise be tossed into the landfill. Our products are 99% upcycled plastic bags and banners. The only parts of our products that aren’t made of trash are the thread and the metal fittings, the zippers and the plastic clips.

The hippest way to carry your cellphone!

The holidays are just around the corner. Why not give your loved ones something they will love AND will help keep plastics out of our landfills!? You can request color choices and custom sizes in belts. Below you’ll see the  custom belt that Sara created for me and I LOVE IT! This is by far the coolest belt I’ve ever had! I wear almost every day and I feel so proud to wear something recycled and fun! Check out Sara Bella  online for more of her great recycled products.

My Belt!

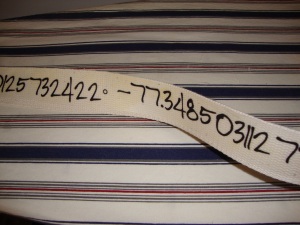
Close up

To view some more of Sara Bella’s products, look below:

The Coolest Server's Apron!


A Tote made from Banners!

 I received this product free of charge and all opinions expressed are my own.

Inspired by LBB

There are a few bloggers out there that I subscribe to and frequent. Lil’ Blue Boo  is one of them. Not only does she create upcycled dresses and children’s clothing that I adore, she also lists some really amazing tutorials! Her latest one featuring a DIY belt of the longitude/latitude coordinates of her was fantastic and I was dying to try it! Of all the projects I take on, belts never occurred to me and I wear one almost every day!

“D” rings and belt strap

Very little sewing…

Sewing the "D" rings on

Transfer paper… Just a note – make sure you use GOOD transfer paper for a project like this. I used some inexpensive transfer paper that I had on hand, and I don’t like the results of it. I will definitely try a different kind in the future. Also, make sure to change your settings to mirror image when you print out your design to avoid wasting a sheet.

After ironing on the transfer

My finished results (after sealing it)…

Really fun!

It didn’t take long at all. Check out Lil’ Blue Boo’s original post here  to see the original tutorial.
Once I have a better transfer paper, I think I will attempt this project again. It was inexpensive and easy to make.

Stamp it Up!

Sewing Supplies

I’ve delved into my stamp collection this past week. Courtesy of a Freecycler I acquired a rather large collection of stamps and ink about 6 months ago and haven’t used them often. I decided to experiment some more with them this week and am really pleased with the results! Above I decorated plain painted formula cans with cute stamps. The cans are perfect for storing so many things, but here they house thread spools, fuse, velcro, pencils and many other supplies.

Plain Shade

Stamps are a really fun way to dress up a boring lamp shade! The lamp shade on my sewing table is far from inspiring. The lamp itself actually needs some work, but that’s a different story.

All you need are stamps, ink, and a clean surface…

I love owl prints!

Stamps are just one more way you can turn recyclable products into personalized works of art or you can dress up home decor! Stamps can be found as inexpensive as 25 cents per stamp or you can make your own! You can make stamps out of LOTS of items…

  • Leaves
  • Bamboo or straws for stripes
  • Toilet paper rolls for circles

You can also carve stamps in potatoes. Cut a potato in half and use an exacto knife or kitchen knife to carve out your choice of designs in the potato. Stamps can be used with stamp ink or paint.

Inspired Gifts Review and Giveaway

Personalized Photo posters make one-of-a-kind artwork!

Who doesn’t love photo gifts? Personalized photo gifts are one of the best way to preserve memories! I love to give photo gifts and create personalized photo books of Brayden. I am definitely an addicted Scrapbooker, but sometimes I like to create phtobooks for a cleaner looking memory. We recently took a trip to Georgia in which I found the best way to preserve all the photos was with a photobook. Not only is it cheaper to print the photobook, but I can include 100’s of pictures in a small, convenient hard back book that would be easy to put in a diaperbag or purse.

Inspired Gifts  offers many eco-friendly options for photo gifts that I didn’t realize existed! I typically purchase from another well known site that doesn’t offer eco-friendly options. I’m excited to have found Inspired Gifts. Furthermore, I’m really excited to share FIVE FREE photo posters with my readers! I was able to create a few of my own. The process was quick and easy and there are several different styles of posters. I used just one picture for each, but you do have the option to tile, add a border, etc. My suggestion: use a high resolution, large image. The clarity wasn’t the best on these prints, but that was because of the pictures that I used.  Below is one of the prints. It’s actually a picture of a picture that is inspiration from one of my favorite artists. It’s displayed to inspire me with color.

Turn favorite pictures into personalized posters for a dorm room, kid’s bedroom or cubicle. Photo posters are also great decorations for birthday parties or for advertising a yard sale or community event.

Make a Photo Poster

  • Choose from a variety of backgrounds.
  • Add your own text to make personalized posters.
  • Our photo posters are printed on glossy, premium paper stock.

All Inspired Gifts press-printed photo books, calendars, cards and Earthtru™ Prints are produced by a Kodak NexPress.

Recyclable

Our Earthtru recyclable photo prints can be ordered on paper that is composed partially of recycled material. Even some elements of the NexPress are made from reclaimed materials and designed for future remanufacturing. Dry inks used by the press are packaged in recyclable containers, and printed sheets generated by it can easily be de-inked.

Chemical Free and Cleaner

Nontoxic dry inks used by the NexPress eliminate the use and production of harmful compounds during printing, cleanup or disposal of the inks. Worried about volatile organic compounds (VOCs)? You don’t have to be with these prints. The press produces virtually no emissions. Even the high-gloss finish is nontoxic and easily removed for recycling.

Pop Art - Andy Warhol Style!

Less Wasteful

Print-on-demand technology eliminates the need for the plates that must be switched for each job on a traditional press. Because the NexPress does not use plates, operators can easily and quickly switch from one print job to the next. Small quantities that would never have been practical or economical in the past now make sense. Customers can avoid placing unnecessarily large orders only to find themselves discarding pallets of brochures or other printed pieces that were never used for one reason or another. Accurate registration and reliable paper handling ensure less wasted paper and decreased consumption of natural resources.

Other eco-friendly options?

Playing cards for your Poker player…
Greeting Cards for all ocassions

WIN IT!

FIVE readers will get to design their own photo poster!

Mandatory Entries: Visit Inspired Gifts  and tell me what product you would like to personalize.

Each entry must be a separate comment! (Only one entry will be counted if you do not leave each completed entry in a separate comment.)

*Subscribe to Journey to “Green” via Email (Subscription must be confirmed) -1 entry

* Suggest friends for Journey to “Green” on Facebook. Friends must actually “like” the page, and you must list their names in a comment. For each person, you’ll get an extra entry!

*Follow Journey2Green on Twitter (Leave Twitter name) – 1 entry

*Vote for me on Top Mommy Blogs -1 entry

*Network with Journey to “Green” on Facebook! If you are a blogger, this is a great way to build a larger fan bag. You’ll find the widget on the right hand corner. – 2 entries

*Vote for me on I’m a Top Mommy Blogger- 1 entry

*Tweet about this post – 1 entry

*Blog about this post – 2 entries

RULES: Open to U.S. Residents. Giveaway Ends September 30th, 2010 at 11:59 pm EST.

The winner will be selected using Random.org. You will have 24 hours to respond. If no response prize will be forfeited and a new winner selected.

I received this product free of charge and all opinions expressed are my own.

DIY headband

While perusing Hallmark last week, I saw a display of really cute handmade style items like wallets, keychains, and headbands. The style was great, but the price tags were awful. One of which was a headband made with only elastic and dye. A piece of knotted elastic is hardly worth $6.00 in my opinion, but I thought it was a good idea for existing or recycled elastic.

I realize that many of you may not have the amount of craft or sewing supplies available so there is some cost involved in making these products however, for this one you could potentially pull elastic out of work sweatpants or worst case scenario, pick up a package for about $2.00 at your local craft store. I, fortunately, am not lacking in craft supplies.

For this project all you need is some waistband elastic and dye or your choice. Paint would also be a great option.

The finished look:

The color options are endless. Wrap the elastic around your head for size and tie a knot.

My color influence:

Tie-dyed burp cloths!